
Day 8: T-Shirt Headband
I was trying to get my flyaways to stay back in my hair, but my bobby pins kept falling out. It was irritating as heck...so I remembered seeing "t-shirt headbands" on pinterest. I saw a couple and decided to try this one

My results: I didn't have a very stretchy t-shirt like the blog called for, so I actually rummaged through my drawer and found some black trouser socks (almost like pantyhose) and cut them up instead. The directions on the blog actually are not very good. You cut 3 strips of fabric about 2 inches thick each, then place them on top of each other. Place the top of the strips inside something to hold it steady, like closed in a dresser drawer. Then braid the 3 strips. The blog said just to wait until you have braided it, and then tie the two ends directly together...but I could tell mine wasn't going to be long enough...so I tied each end off, then pulled one of the strips from each side to stretch it out more, then tied those 2 together. Mine is actually just a BIT too small, but it still basically works. You'd want to get longer pieces of fabric if you want to try this. But...it does the job on a bad hair day.


Day 9: Blog Post: Teaching Children Responsibility
It talked about age appropriate chores for preschool aged children and up, and the benefits of giving them responsibility. You start small and gradually add more as they get older. It recommended for age 3 (Grant is almost 3): "Put forks and napkins on table. Wash table before setting. Stir mixture for dinner. Lead thanks or prayer at the table." I think I will try this. Grant already "helps" me put wet clothes in the dryer and tries to "help" sweep, etc., but I like the idea of having him try something specific on his own. I think it would be easy enough to give him a washcloth to wipe down the table. And he already likes to say the prayer sometimes too. Forks and napkins might be a little harder for him, but I'm going to give it a try!
Day 10: Calm Jar
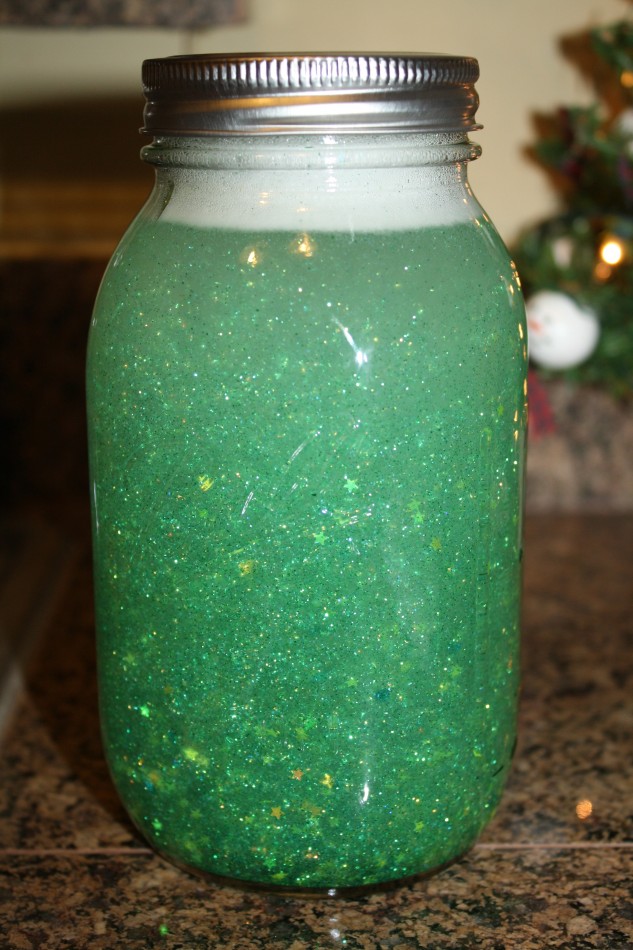
My results:

I did a few things different than the pin. For instance, it says to use glitter paint and 3 "pouches" of glitter. I didn't have glitter paint, and I wasn't sure how much a pouch of glitter was. I ended up putting in 3 tablespoons of glitter (3 different colors, red, silver, and sparkly white). It looks like way too much! Oh well. I also added 3-4 drops of red food coloring to give it a tint (since I assumed that's why it asked for glitter paint). That worked well. I tried to be creative and added in a few silver beads I had from a broken necklace and also some of those plastic refrigerator letters, thinking that would look cool...but you can't really see them. So basically, just stick with a little glitter and food coloring. Grant likes it!
Day 11: Glitter clothespin magnets
There was another broken link for this pin. I hate those! Here is the pic & instructions, though.

Cover clothes pins with glitter, put a magnet on the back, and you have an instant way to display things on a board. ALSO...Mod Podge over the top of the glitter and it wont shed everywhere.
My results:

Mine (of course) don't look as nice as the original picture, but I still like them. I like hanging things on clips on my fridge, so these are perfect. I painted a little mod podge on the clothespin, then sprinkled with glitter. I waited several hours for it to dry, and then I carefully painted a LOT of mod podge over the top (you have to be careful because it can pull a bit of the glitter off). It took a really long time to dry, but it worked- the glitter does not fall off. I had a roll of magnet "tape" (basically magnet on one side, adhesive on the back) and I attached it to the back of the clothespin when dry.
Day 12: Homemade Granola Bars
I am really excited about this! I think this will be something I'll do over and over again, especially since it's pretty easy and you can change it up if you want.
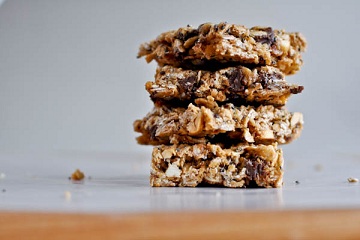
My results:
They turned out really yummy. The taste reminds me of a cross between no bake cookies and a classic granola bar. As I was making them, the smell of the oats, honey, and nuts together seemed awesome too....so maybe sometime I'll try it with just those ingredients. This recipe has you add peanut butter and then whatever else you want (dried fruit, flax seeds, chocolate chips). I added chocolate chips.
Mine came out a little too dry, and as a result kind of falls apart when you take it out of the pan. The blog said if it was too dry, to add more honey or peanut butter...but I guess I didn't realize it needed more. So next time, more honey.
It is YUMMMMMMY!

Day 13: Chocolate Chip Cookie for One!

AGAIN...the link was broken, so I followed the instructions on the Pin caption, which are:
For those days you just want to make one cookie... 1 tbsp. butter, melted 1 tbsp. white sugar 1 tbsp. brown sugar 3 drops of vanilla pinch of salt 1 egg yolk 1/4 c. flour 2 tbsp. chocolate chips MICROWAVE 40-60 SEC IN A CUP OR BOWL. single serving deep dish chocolate chip cookie, YAY!!
My results:

It looked...gross when I got it out of the microwave. Actually after 60 seconds it looked still raw, so I put it in for 30 more seconds. It looks yellow-y to me, but I guess that's because you use an egg yolk only instead of the whole egg.
Anyway, after it cooled down, it looked more normal than this pic. I tried it, and actually it was pretty good. It didn't taste EXACTLY like a regular chocolate chip cookie that I would normally make, but it gets the job done if you have a craving and don't want to make a batch of cookies. It is REALLY easy and quick, so it's practically immediate satisfaction. 
Day 14: Halloween Decorations
I saw this pin and I didn't follow the 'initial' decoration suggestion, but I looked through the ideas on the website and decided to do several different silhouettes with construction paper since I didn't have the other materials.

Our results:

The picture is not great, and the tape looks kinda ghetto, but I was dealing with 2 grumpy babies at the time, lol. I think it will look cool on Halloween if we put a light behind it like the website has.
STAY TUNED FOR WEEK 3!!!


No comments:
Post a Comment